It’s been 8 months since I’ve brewed a batch of beer. I try to keep four kinds on tap at all times and we currently have one. It is an untenable situation to have so many empty kegs lying around! Time to fire up the brewery now that the ground water temp is low enough for efficient cooling and it’s not over 100o F with 95% humidity (Raleigh weather from, oh, about May to Mid Oct.)
Time to dust off the brew-stand and equipment.
Today I’m going to make 10 gal of my house Pale Ale (a Sierra Nevada Pale Ale Clone). Here is how it’s done.
20 lbs of Maris Otter and 2 lbs 60oL crystal malt starts out like this:
Crush in the Barley Crusher
Ends up like this:
Time to mash.
My mashtun is a 48 qt Rubbermaid cooler with the drain removed and retrofitted with a manifold made of CPVC pipe (CPVC is used because it is made to take higher temperatures than PVC). Grain is mixed with hot water to convert the starch to fermentable sugar.

The manifold is made of CPVC to withstand the higher temp of mashing and mashout. The cooler is stained from making dark beers despite being washed each time I use it.

The cross piece has been rotated up to see the 1/16″ holes drilled all along the length. The holes face down during the process to get as much wort out as possible.
Here is the mash at 155o F. I’ll hold this temp for about an hour for this recipe.

22 lbs of grain + 7 gallons of hot water. Let sit one hour to allow the enzymes to convert the starch to fermentable sugars.
The hot wort is recirculated ~2 qts at time until it is reasonably clear. Usually takes about 4-6 qts.
Then it’s allowed to run off into the boil kettle until the grain bed is dry and no more runs out of the cooler. Add another infusion of hot water, stir well to liberate all the sugar, recirculate the hot wort as before and run off into the boil kettle. Whole process takes ~20 min. I’ve now done what’s called “batch sparging”. The result is 13 gallons of hot wort ready to be boiled with the hops for bitterness and flavor.

First runoff. the result will be 6.5 gallons of wort. Another 6.5 gallons is added to the mashtun, recirculated as before and allowed to drain. 13 gallons of future beer!
It’s good to know what your concentration of sugar is before you start to boil. This allows you to calculate, among other things, the mash efficiency i.e. the amount of sugar you successfully got from your grain relative to the theoretical max. It’s a critical calculation for all grain brewing if you want to formulate a recipe or modify one from someone else since every brewing system is slightly different.
Knowing the original specific gravity allows you to adjust some other brewing parameters if you need to, such as hops amounts and boil time. Hops utilization (the amount of bittering units extracted) is affected by the concentration of sugars in the boil kettle.
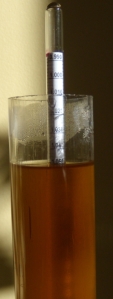
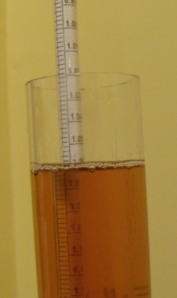
The pre-boil specific gravity for this batch is 1.052 , a little higher than I want for this recipe but still in the right range. Quick calculation shows that this is approx. 86% mash efficiency. A little high for my system (I might need to check the hydrometer since it’s new).

The original specific gravity (O.G.) is 1.052. Pure water is 1.000. The hydrometer is read at the bottom of the meniscus.
Everything looks to be within operational parameters! The Magnum hops go into a nylon bag which is suspended in the boiling wort (think big tea bag).

Hop pellets for bittering. Magnum is a great, clean, bittering hop. Tettnang and Cascade will be added later for bitterness, flavor and aroma. The amount of hops to add is calculated based on the desired bitterness and the alpha acid percentage in the hops.
Now here is the hurry up and wait part. It takes a bit of time to get 13 gallons of water up to a rolling boil. Time to check email, drink coffee, play with chickens, or whatever.
More hops in at 30 min, 10 min and flameout. Don’t forget the whirlfloc to aid clearing!
Time to transfer from boil kettle to sanitized glass carboys. The key thing here is to cool as quickly as possible down to yeast pitching temps, preferably 70o F. I use a small plate chiller that I also immerse in ice water. It’s not the best plate chiller out there but the price was right at $40.
Cold water goes in on one side of the plates and the hot wort travels in the opposite direction on the other side of the internal plates. Heat is transferred to the cold tap water and goes to the lawn or garden or water barrel. The cooling water and wort are never mixed. I also sometimes use a 35 gal trashcan filled with water and a sump pump to recirculate the water through the chiller instead of using tap water. During the summer our tap water is 85o F and does not provide sufficient cooling. I suppose recirculating the cooling water is more eco-friendly and easier on the water bill.
Start the flow by pulling a vacuum on the carboy. Adjust flow rate so that the wort is cool coming out. Both carboys are filled and ready for yeast (oops, forgot to take a pic of the carboys filling up).
The final gravity is a little higher than I wanted at 1.060, meaning a little more kick in the final product. I ended up with 10.5 gal in the fermenters. Another quick calculation shows my brewhouse efficiency at 80%.
Now the worst part of the 6 hour brew session…cleanup. Lots of washing to do. You learn to cleanup during the “hurry up and wait” parts of brewing and not at the very end! Spent grain goes into the compost bin (it will really heat up a compost pile fast!) Some is saved for the chickens too. It can also be used to make a good “spent grain” bread.
Pitch the yeast, in this case Fermentis US05. The carboys are kept in the garage to help control fermentation temp. Fermenting ales between 65o F and 70o F is perfect.
In two weeks it’ll go into the kegs in the kegerator to carbonate and age a little before drinking.
Being rusty made for a longer than usual day in the brewhouse (AKA the garage). The results will be worth it though!
Cheers!


Excellent! You are the best brewer in the whole house, George! 🙂
Thanks, schmoopy! I might even let you have some! 🙂
Good stuff, maynard.
Pingback: Vacation Brew Day | Mash Talking